How to make an easy paper airplane, step by step
One sheet of paper, small hands and a little patience: that's all you need. This is the airplane we use in all our cut-outs. It has a lock that keeps it folded, so it doesn't open in the air and glides beautifully. Here's how to fold it, with a drawing for every step.
 I made it with my little dinosaur paws, so you can too! The most important thing: press every fold flat with your fingernail.
What you need
- Regular printer paper (A4 or Letter), not cardstock.
- A flat table for folding.
- Optional: crayons, if you want to decorate it first.
Step by step
 1
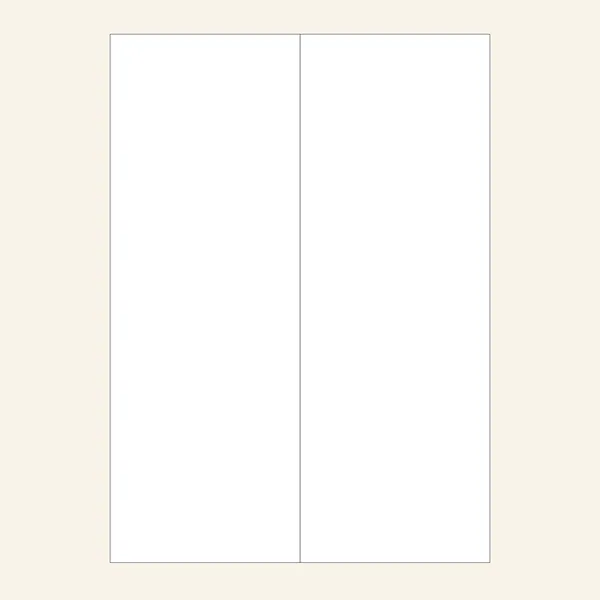
Mark the center
Fold the sheet in half lengthwise and open it again. That line is your guide.
 2
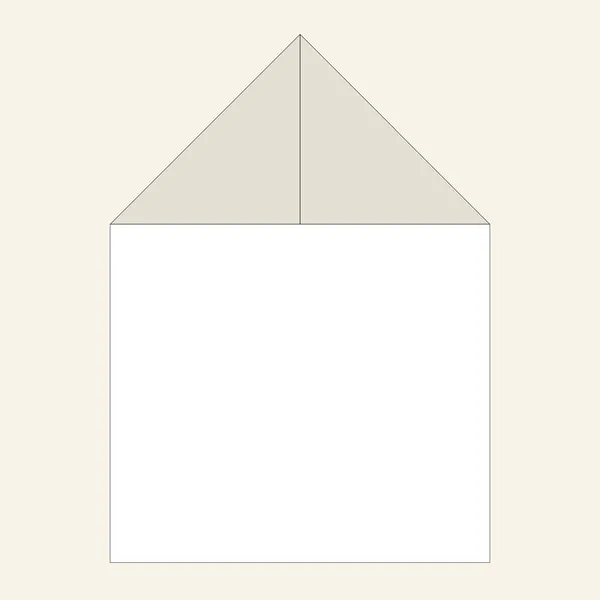
Corners to the center
Bring the two top corners to the center line. You get a roof.
 3
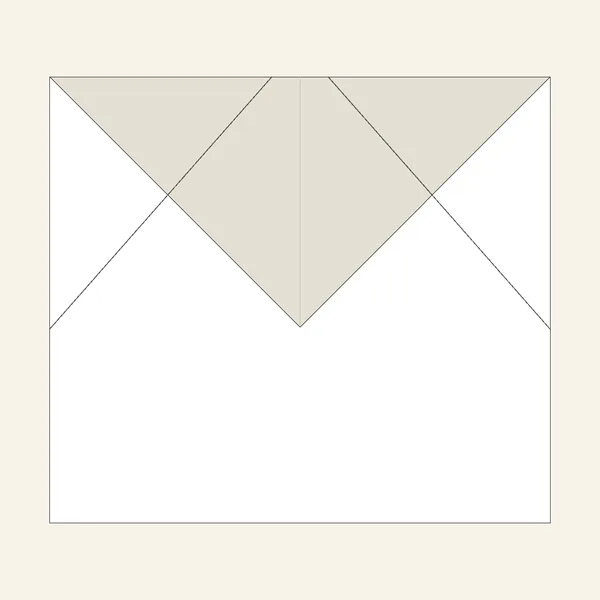
Fold the tip down
Fold the big tip down until the roof looks like an envelope.
 4
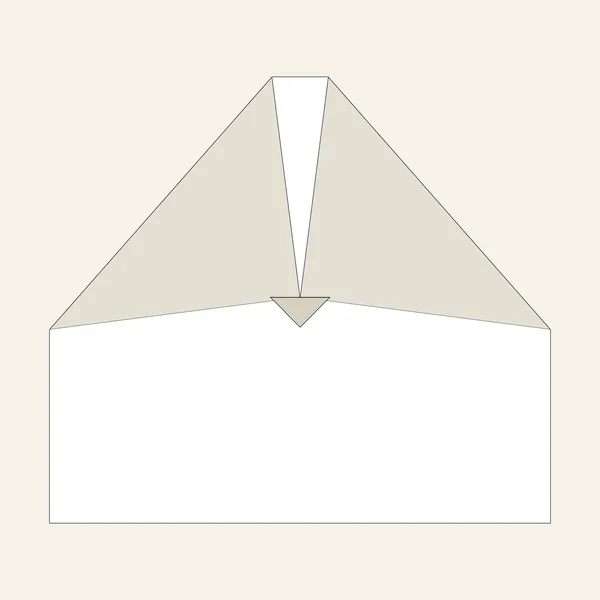
Center again
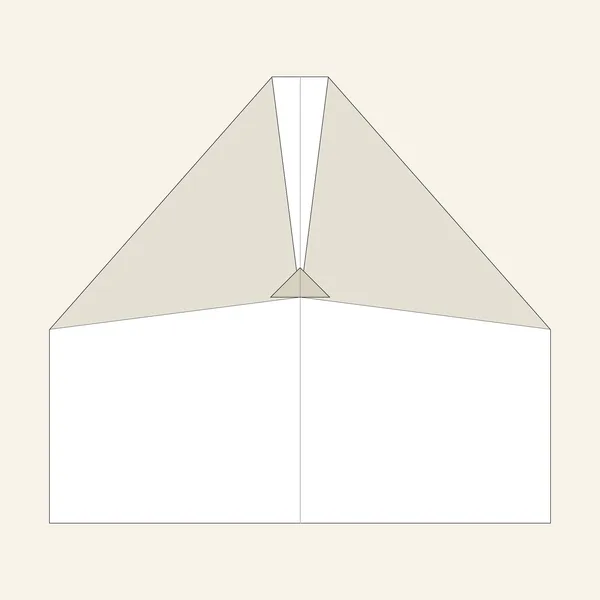
Bring the two top corners to the center line again. A little point peeks out underneath.
 5
The lock
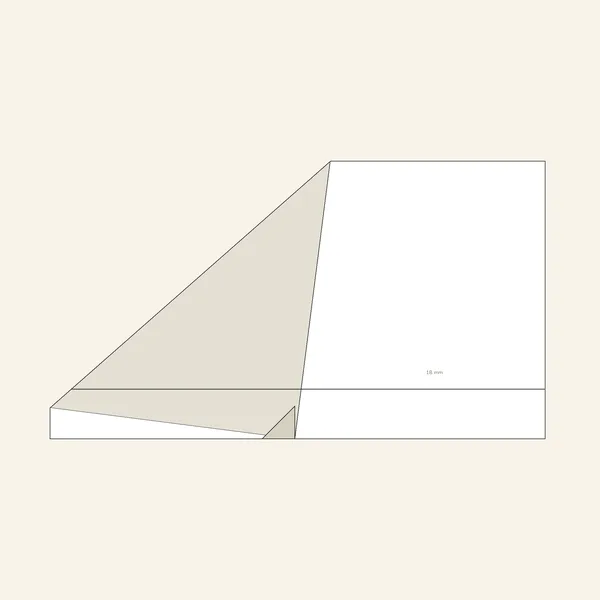
Fold that little point up over the corners. That's the trick that stops the plane from opening.
 6
In half
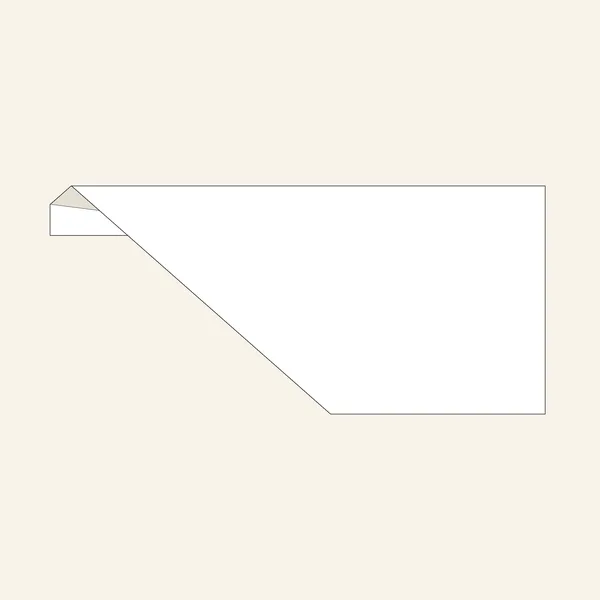
Fold the plane in half, with the little point on the outside.
 7
The wings
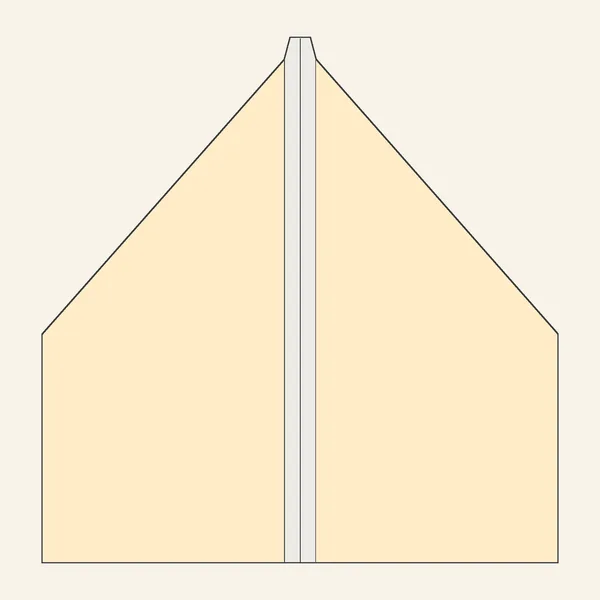
Fold each wing down, one on each side, leaving a belly one finger wide.
 8
Done!
Open the wings flat, straight like a table. Ready for takeoff!
How to throw it farther
- Hold it by the belly, near the nose.
- Throw it straight and gently, slightly upward. Paper planes fly better slow than hard.
- Never toward anyone's face. Best in a hallway, a clear living room or the park, without wind.
If it doesn't fly well
- Nosedives: bend the back edge of both wings up a tiny bit.
- Shoots up and stalls: bend those edges down a little.
- Turns to one side: check both wings match. If they do, bend up the back edge of the wing on the opposite side a tiny bit.
- Opens in the air: redo step 5 and press the lock firmly.
3 paper airplane games
Who flies farthest?
Mark a start line with painter's tape and write down every record.
Landing strip
Put a towel on the floor a few steps away. Who can land on it?
Through the hoop
Hold up a hoop (or a belt in a circle) and try to fly the plane through it.

Frequently asked questions
From what age can they make it?
From 4 with help, and from 6–7 almost on their own. Folding along lines is great fine-motor practice.
How long does it take?
About 10 minutes the first time, and 3 minutes once they know it.
Which paper airplane flies farthest?
A symmetric one with firmly pressed folds that doesn't open. That's why ours has the lock in step 5.
Can I use colored paper?
Yes, as long as it's thin. Cardstock is too heavy.